How to Colour Objects Blue in Fusion 360
1. Opening Fusion and controlling your view
It's time to end your con-"Fusion" about 3D printing!
1-a. Open Autdesk Fusion 360 by clicking on its icon, or by doing a search for "Fusion" from the Start menu. There may be multiple applications in the Autdoesk suite installed on your computer. Click the one whose icon looks like this:
![]()
b. A window should pop up that looks something like this:
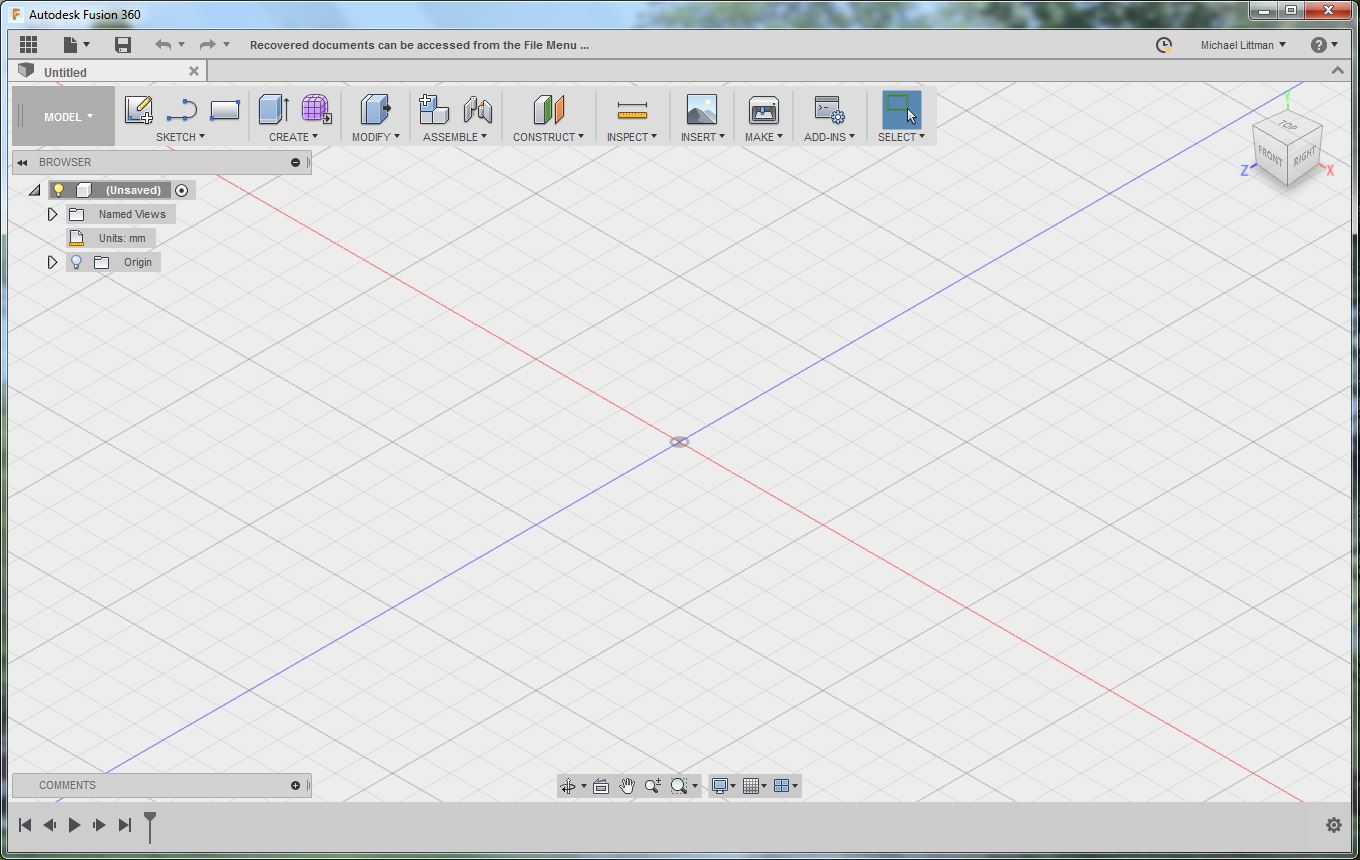
c. As you can see, there is an origin in the center and two axis (red and blue) in a plane. Scroll to zoom in and out. Hold the middle button (scroll wheel) down while moving the mouse to move your view. Hold the middle button and the shift key down at the same time while moving your mouse to rotate your view. The view cube in the upper right corner of the screen can also be used to manipulate your view. Play around with these controls until you are comfortable using them.
2. Sketching a rectangle
Let's build some knowledge we can "draw" upon later!
2-a. In the next few steps, we are going to extrude a rectangle to create a rectangular prism base for our name plate. To do this, click the "2 Point Rectangle" button at the top above "Sketch." It looks like this:
![]()
b. You'll see three yellow planes appear in the middle. If you move your mouse near one, it will turn blue. Select any one of these planes to sketch in by clicking on it.
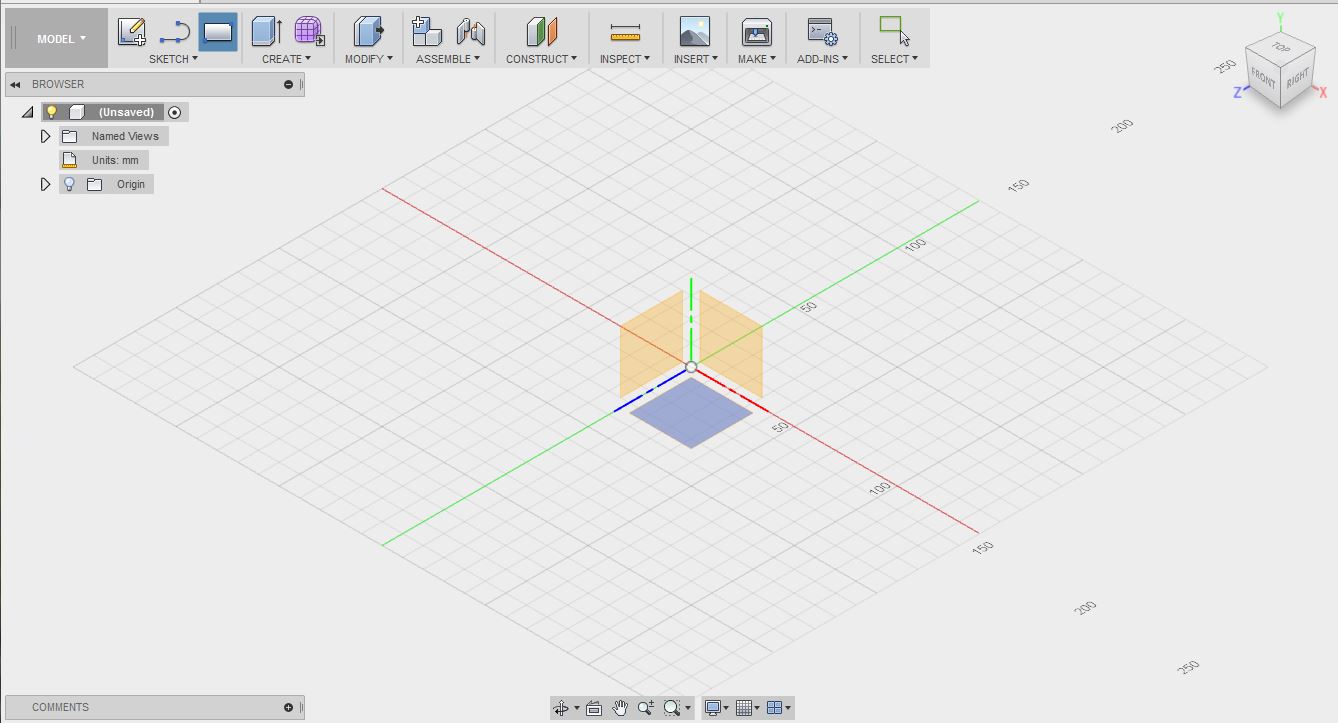
c. The view will rotate so you are looking top-down at the plane you are sketching in. The color of the lines and their orientation may be different, but it should look something like this:
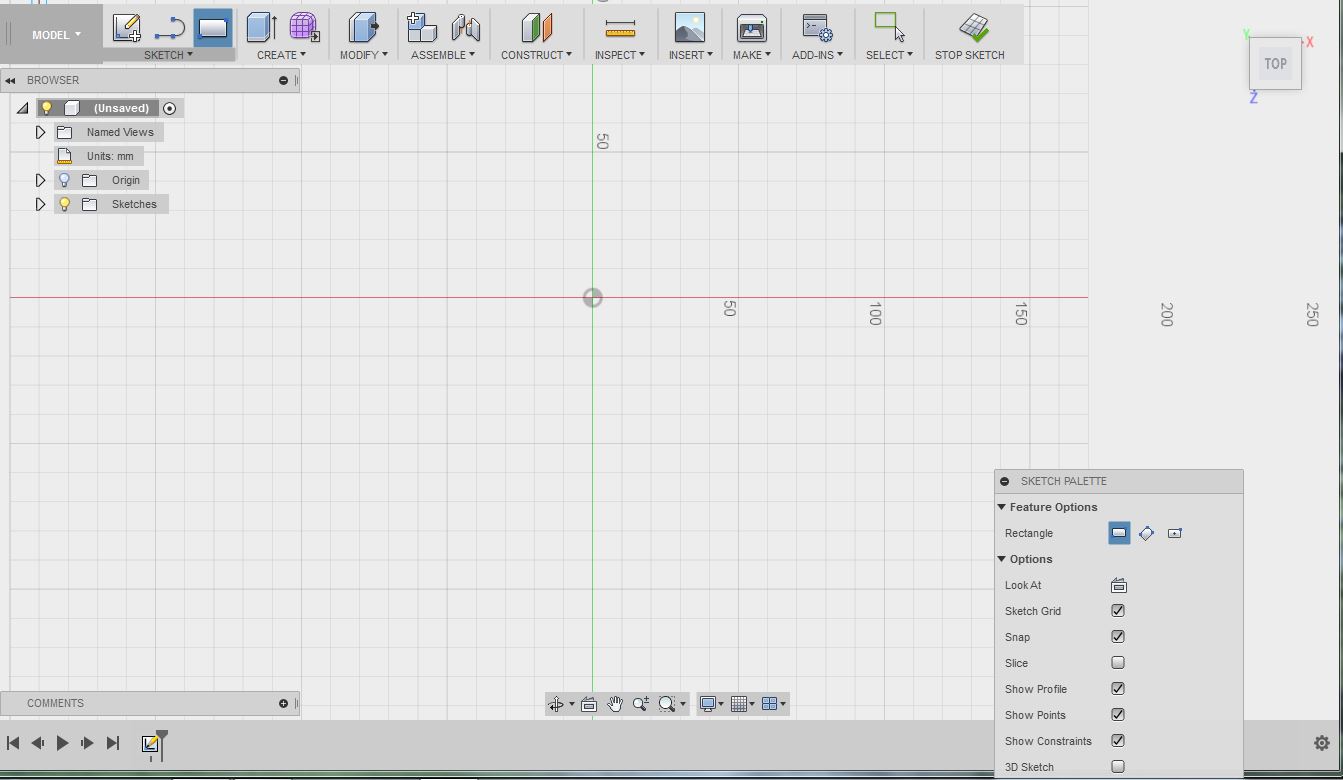
d. We are now ready to draw our rectangle. Click on the origin (where the colored lines) place the lower left corner of the rectangle.

e. Now, it is time to place the upper-right corner of the rectangle. Place it 20.0mm up and 100.0mm to the right of the origin to create a 20 by 100 rectangle.

f. Once, you click, your rectangle will fill with yellow, as shown below. Congratulations! You made a rectangle in Fusion.

3. Extruding the rectangle
Let's get a more "solid" grasp of how to use Fusion!
3-a. Now that you have accepted the sketch, it will turn orange and become a 3-D solid object. The extrusion tool takes a 2-D sketch and gives it a thickness. To extrude the rectangle, click on the "Extrusion" tool, which has the icon shown below. It can be found above "Create" in the toolbar.
![]()
b. Your view will rotate to a give you a better perspective. It might look something like this:

c. We need to select the sketch we want to extrude. We want to extrude our rectangle, so select it by click once in the center of the rectangle (not on the edge). It will place an arrow in the direction of the extrusion and an "Extrude" dialog window will pop-up.

d. In the dialog window, ensure that the direction is "One Side" and the extent is "Distance." Then, type 2mm into the distance box (either the one in the dialog window or the one near your rectangle). Press enter or click "OK" to perform the extrusion. The object will turn into a 2mm thick rectangular base like this:

4. Add your name
Achieving "name" and fortune!
4-a. Now that we have our rectangular prism, we would like to carve letters into it (extrude them inward to remove material). To do this, click the "Create Sketch" button in the "Sketch" portion of the toolbar. It looks like this:
![]()
b. Your view will shift and the 3 yellow planes will appear.

c. This time, select the upper surface of the rectangular prism by clicking in the center of it. Make sure not to select a side surface or edge instead by accident. The view should shift to show that surface from a top-down perspective as seen below.

d. To add text, click on the word "Sketch" to bring up the sketch drop-down menu. Now, select "Text." Click in the center of your rectangle to place the text. A blue dot and an indication of the text's orientation will appear.

e. A window will also pop-up to allow you to enter your text. Enter your name and type in a reasonable height such as 10mm. Select the font "Franklin Gothic Heavy" (the same font used on the title of the classic movie Rocky) and make sure the angle is 0.0 deg. Click "OK." To bring up this window again, double click your text.
5. Orient and position your text
This is some "text" level shift!
5-a. Your text will appear in the rectangle. It may be upside down (like in the example below):

b. If it is upside-down, you can flip it by opening the text edit window by double-clicking on the text. Type "180" for the angle to rotate your text to be right-side-up. Click "OK" to close the pop-up window.

c. Now, we need to position the text. To do this, drag the lower-left corner of the text (there should be a dot to drag) to where you want it – you'll want to leave about 2-5mm of space around all edges. Also, be careful not to let it lock onto one of the edges (it may automatically do this if you place it very close to an edge). This is a good example of where to place your text:

d. Now, we want to increase its size. This can be done by dragging the upper right corner. Be careful not to rotate the text as you change its size – if you do rotate it, remember you can double click on it to bring up the edit text window that allows you to type in the angle you want. Also, if your name is too short or long to look nice, consider adding or removing your last name. When you are done, it should look like this:

6. Extruding the text
"Hole"y smokes – we're almost done!
6-a. To extrude your text, click on the "Extrude" button (in the "Create" part of the toolbar) that looks like this:
![]()
b. Click the text you created to extrude it. Your view will rotate to give you a better view and pop-up window will appear labelled "Extrude"

c. You'll notice a blue arrow in the direction of the extrusion. We want to extrude the text into the base, so if you're blue arrow is facing up, set the extrusion distance to -2.0mm (in the extrude window). Make sure the direction is set to "One Side" and the extent is set to "Distance." The Operation should be "Cut." The preview will show the text extruding downward, like in the image below:
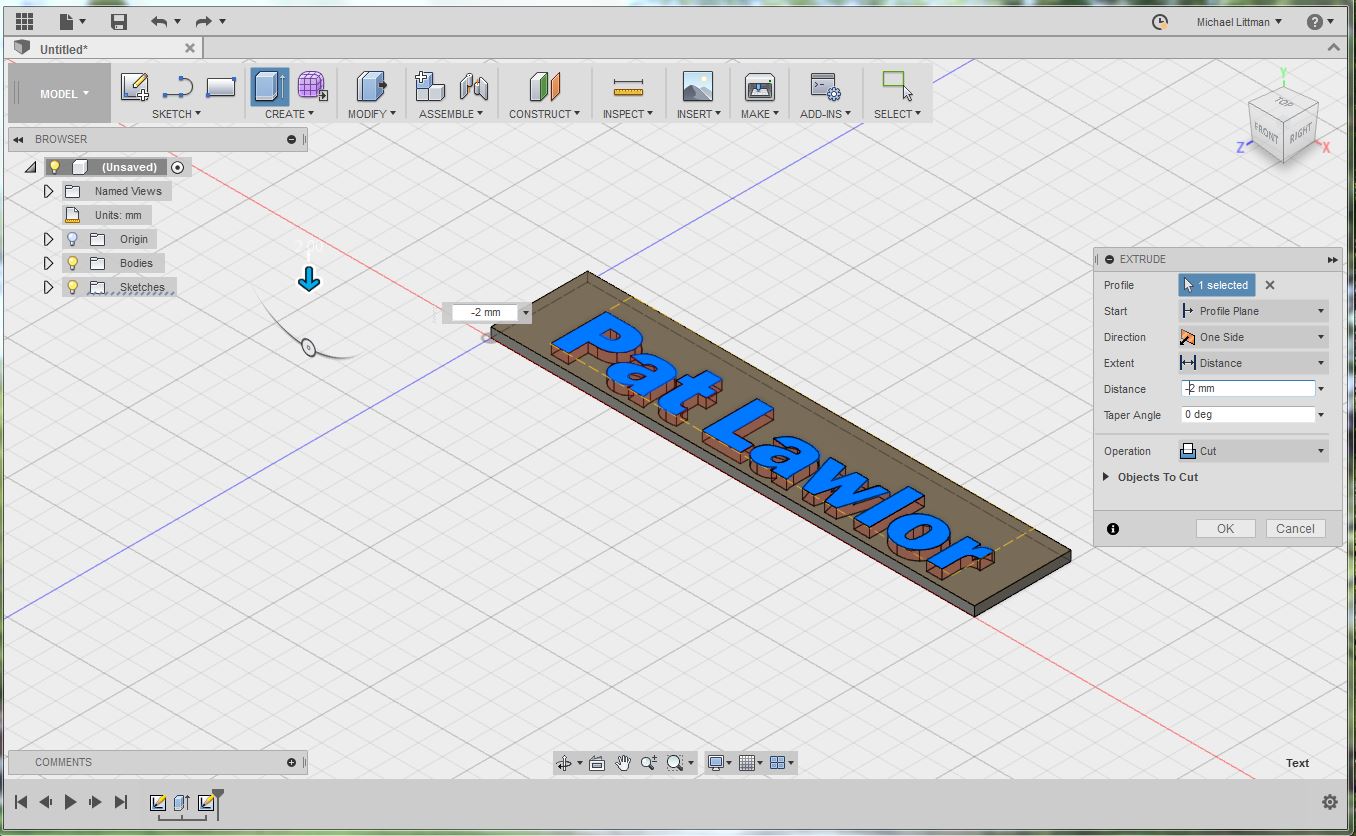
d. If your nameplate looks like the one above, click "OK" to confirm the extrusion. Your name plate will now be one solid color with the name cut out.

e. Unfortunately, the nameplate is made of several objects, not just one (for example, the islands in the P, a and o of the nameplate above are separate objects. However, we want to select them all together. To do this, click and drag the mouse to create a selection. You'll want to start above and to the left of the entire object and drag down and to the right until the entire object is covered by the selection rectangle. The objects will turn blue to indicate that they are selected:

f. With the objects still blue, right click on them and select "Create Selection Set" from the list that pops-up. You may notice that a drop-down option appeared on the left side of the screen called "Selection Sets."

g. Click on the arrow to view what's under the "Selection Sets" header – you'll notice your selection set is there! (It may have a different name/number than mine):

7. Saving as STL file for printing
You'll have to "save" your excitement for a bit longer!
7-a. Now it is time to export your object in a format that can be 3-D printed. The mojo printer accepts .stl files, which are composed of a triangular mesh. To create an STL file, click on the "3D Print" button that looks like this (in the "Make" section of the toolbar):

b. A menu will pop-up that looks something like this:

c. Set the Refinement to "Medium" and uncheck the "Send to 3D Print Utility" checkbox. View the "Refinement Options" section by clicking on the triangle to its left. If "Surface Division" is set to 0, try selecting a different setting for Refinement and then changing it back to "Medium." That often fixes it. The numbers should look something like below (they may be slightly different values):
d. Now, we are going to select the nameplate by clicking on the selection set we created (its under "Selection Sets" in the list/menu on the left." You'll know it's selected when the entire nameplate (including the little islands in the middle of letters like P,a, and o) are highlighted in blue. It should look like this:

e. If everything is in blue (like in the above picture), click the "OK" button. A window will pop-up asking you where you want to save your file and what its name should be. Make sure the type is set to "STL Files (*.stl)" and type the name of the file. Click the "Save" button to save your STL file.
You are now done with the modeling portion of the tutorial. Now, it's time to print your nameplate on the Mojo 3-D printer!

8. Importing your object into Print Wizard
Let Print Wizard work a little magic for you!
8-a. On the computer adjacent to the Mojo 3-D Printer, open up the Print Wizard software by clicking on its icon
b. A window will pop-up asking you to find the file you would like to open. Select the .stl file that you had created in step 7. It will probably be in an undesirable orientation such as the one below:
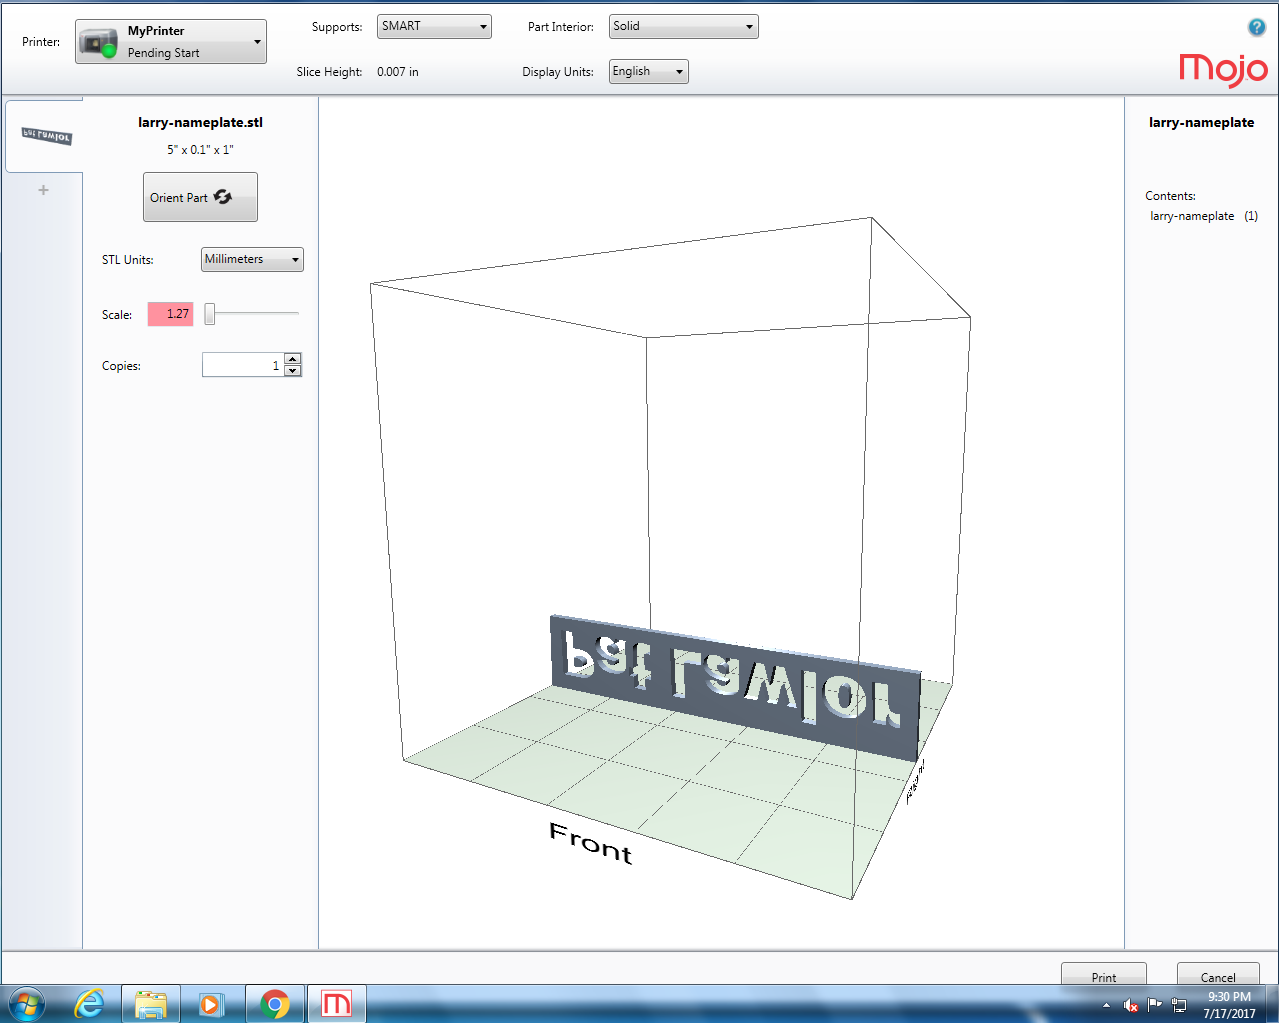
c. Click the "Orient Part" button and select the orientation that depicts the nameplate lying down on the plate with the text facing up (so that someone looking down at the nameplate from above could read the name). Make sure the text is not backwards! That is very important!

d. Enter 0.7 for the scale (on the left) and make sure the units are Millimeters (mm). Set copies to 1.
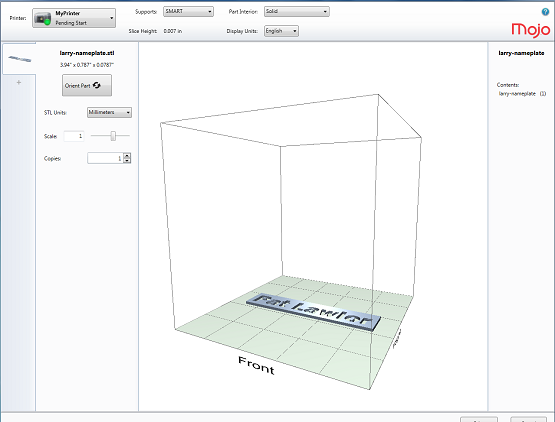
e. Change Supports to "SMART" (minimum) and change the "Part Interior" to "Sparse – Low Density" using the drop down menus. These settings are important, since the print will take a lot longer otherwise.

f. After examining your part in the center of the screen, click the "Print" button in the bottom-right corner.
![]()
g. A window should pop up showing confirming that the print has been sent and providing an estimate of how long the print will take and its material consumption. At 0.7 scale, it should take approximately 15 minutes. At full (1.0) scale, your nameplate would take about 30 min to print.
9. Printing the object
It's time to work your "mojo" on the Mojo!
9-a. The file has been sent to the Mojo printer and is in the queue, waiting to be released. So, now, it is time to get the printer ready for printing. Your Mojo 3-D printer should be turned on (as indicated by the green light, Mr. Gatsby)
b. Now, open the door in the front. By gently pulling it down.
c. Remove the old build plate if it's in there (it is a piece of black plastic). Then, grab a fresh build plate and insert it into the printer. It slides in and down, then clicks into place as it's moved forward. Ensure that the two plastic containers on the sides that catch the excess plastic are not full.
Note: The Mojo's build plates are not intended to be reused. Thus, it is best to print as many items as you can per plate (a.k.a find some friends to make nameplates with!)
d. Close the door securely. The green indicator light will stop flashing and will turn solid green. You are now ready to print!
e. To begin the print, you'll need to open up the "Mojo Control Pane" application by clicking on its icon.

f. A window will pop-up showing the printer's supply levels and condition.
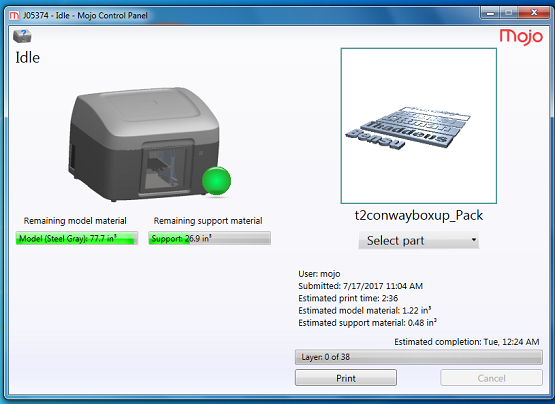
g. On the right side of the screen, you will see a preview of an object. Click on the drop-down menu below it to select your part. Once you have your part selected and see a preview of it in the frame in the upper right corner, confirm that there is sufficient model and support material by comparing the estimates with the remaining material levels (if it will be a close call, seek the advice of a professor or TA). Also, ensure that the print time is 10-20min per nameplate (print time is given in hours). For example, if you are printing 5 nameplates, it should take about 1-1.5hrs.
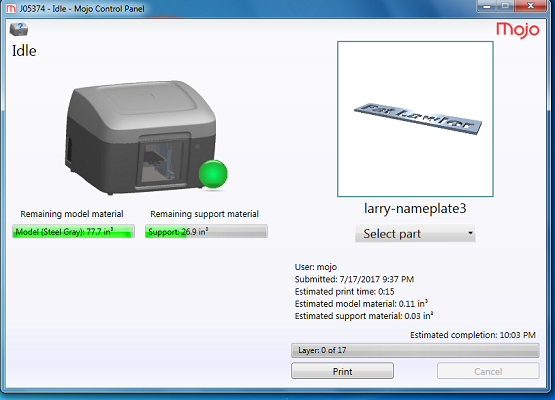
h. If everything is good, you are ready to go! Click the "Print" button near the bottom right corner. When the printing is finished, you will have your very own two-color plastic nameplates. Carefully peel the ivory support material off the plastic base to remove your nameplate from the black build plate. Your nameplate should sport two colors and look something like this (with grey being whatever material color you printed with).
i. Congratulations! You just designed and printed yourself a two-color nameplate – from scratch using the Fusion 360 software package and the Mojo 3-D printer!
With skills like these, you can transform Princeton into "Prints-ton!"
Source: https://commons.princeton.edu/josephhenry/fusion-360-nameplate-tutorial/

0 Response to "How to Colour Objects Blue in Fusion 360"
Post a Comment